MOUNTING PAPER ONTO CANVAS:
Most of my large paintings are created on paper first, then mounted onto stretched, gessoed canvas. I get excellent results following the process outlined below.
* My thanks to fellow artist Barbra Edwards [http://www.barbraedwards.com] for taking such great photos of my paper mounting demo and allowing me to use them here.
Things you will need before you start:
• your painting (or prepared paper)
• an area large enough to lay painting down flat. I use the floor for the first part, and move to a large table for steps 10 - 18
• pre stretched and gessoed canvas
• easel (or something to put your canvas on).
• clean bucket filled with clean water
• Golden Regular Gel Medium (matte)
• Golden Acrylic Glazing Liquid (glossy, satin or matte)
• clean container to mix gel and glazing liquid together
• clean, non abrasive, soft cloth. An old cotton face cloth works great.
• large sharp needle or safety pin
• spray bottle filled with clean water
• large clean brush for applying adhesive to canvas (I use a good quality, 2" house painting brush)
• clean drop cloth large enough to lay your painting on, face down, without wrinkles or bumps in either painting or cloth.
• Sharp blade. I use a blade from my mat cutter. A utility knife with a fresh blade would also work well.
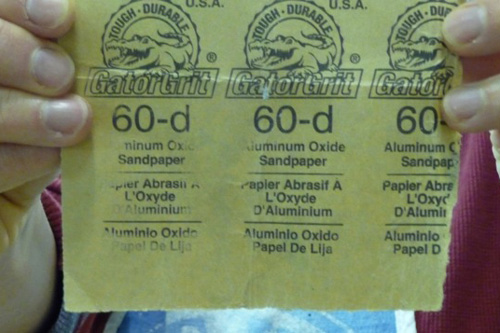
• Rough sandpaper - 60 grit - and finer finishing sandpaper.
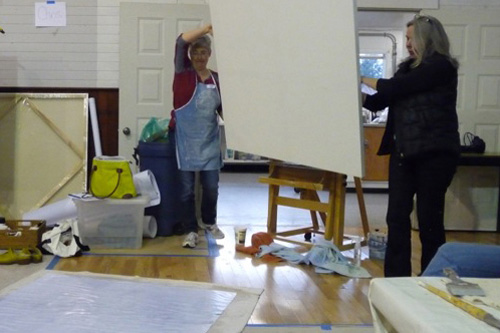
• A studio helper if you painting is any larger than about 24" x 24".
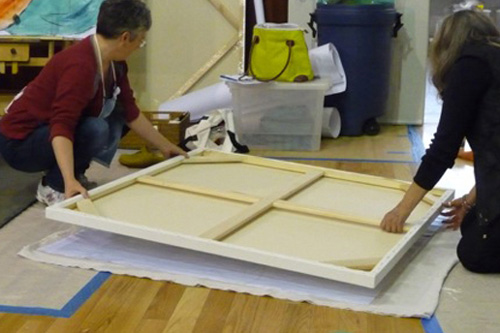
1. Set canvas on easel
2. Lay out drop cloth (on floor for large paintings) and smooth out bumps and folds. Place painting FACE DOWN on drop cloth. This drop cloth will get wet around the edges of your painting, so make sure it is large enough to protect your floor. Mine sticks out about 8" or so around the edges of my painting.
3. Scoop some gel medium into a clean mixing container. For a 48"x48" canvas, I use about 250 mL, maybe a bit more. While stirring, add enough glazing liquid to thin the gel to the consistency of stirred yogurt or melted ice cream. Not runny, but not stiff either. Get ALL the lumps out. Avoid using old gel with lumps. If there are lumps in your mixture, you will end up with lumps under your paper that you will be stuck with them FOREVER. Using glazing liquid in the mix makes the Gel Medium easier to paint onto your canvas, and also extends your working time. Set aside.
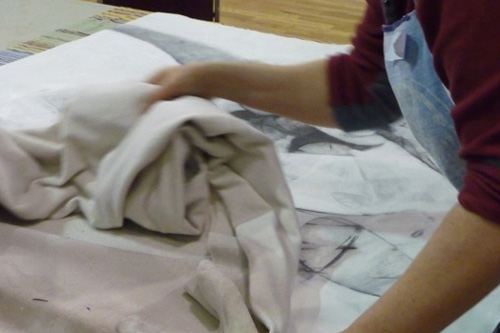
4. Carefully pour a small puddle of water on back of painting. Yes.. right on the raw paper! Take a soft cloth, soak with water and squeeze out over rest of painting. Gently smooth water around entire back of painting, spreading puddle and adding more water when needed until paper is completely saturated, and no longer absorbing water. It will buckle as it absorbs the water. Don't panic. This is supposed to happen. Squeeze more water onto it and let it sit while you prepare canvas.
* My thanks to fellow artist Barbra Edwards [http://www.barbraedwards.com] for taking such great photos of my paper mounting demo and allowing me to use them here.
Things you will need before you start:
• your painting (or prepared paper)
• an area large enough to lay painting down flat. I use the floor for the first part, and move to a large table for steps 10 - 18
• pre stretched and gessoed canvas
• easel (or something to put your canvas on).
• clean bucket filled with clean water
• Golden Regular Gel Medium (matte)
• Golden Acrylic Glazing Liquid (glossy, satin or matte)
• clean container to mix gel and glazing liquid together
• clean, non abrasive, soft cloth. An old cotton face cloth works great.
• large sharp needle or safety pin
• spray bottle filled with clean water
• large clean brush for applying adhesive to canvas (I use a good quality, 2" house painting brush)
• clean drop cloth large enough to lay your painting on, face down, without wrinkles or bumps in either painting or cloth.
• Sharp blade. I use a blade from my mat cutter. A utility knife with a fresh blade would also work well.
• Rough sandpaper - 60 grit - and finer finishing sandpaper.
• A studio helper if you painting is any larger than about 24" x 24".
1. Set canvas on easel
2. Lay out drop cloth (on floor for large paintings) and smooth out bumps and folds. Place painting FACE DOWN on drop cloth. This drop cloth will get wet around the edges of your painting, so make sure it is large enough to protect your floor. Mine sticks out about 8" or so around the edges of my painting.
3. Scoop some gel medium into a clean mixing container. For a 48"x48" canvas, I use about 250 mL, maybe a bit more. While stirring, add enough glazing liquid to thin the gel to the consistency of stirred yogurt or melted ice cream. Not runny, but not stiff either. Get ALL the lumps out. Avoid using old gel with lumps. If there are lumps in your mixture, you will end up with lumps under your paper that you will be stuck with them FOREVER. Using glazing liquid in the mix makes the Gel Medium easier to paint onto your canvas, and also extends your working time. Set aside.
4. Carefully pour a small puddle of water on back of painting. Yes.. right on the raw paper! Take a soft cloth, soak with water and squeeze out over rest of painting. Gently smooth water around entire back of painting, spreading puddle and adding more water when needed until paper is completely saturated, and no longer absorbing water. It will buckle as it absorbs the water. Don't panic. This is supposed to happen. Squeeze more water onto it and let it sit while you prepare canvas.
5. Lightly mist canvas with water. This will make bushing on gel/glazing mix easier. Brush on layer of prepared gel/glazing mix, covering well, and evenly. Be sure to coat the entire surface, right out to the edge.
6. Go back to your painting. Squeeze excess water out of cloth and drag it gently over back of painting to pick up excess water. Take care to not to rub paper surface as it will be very soft and is easily damaged by rough handling. DO NOT attempt to move the paper at this point.
7. While paper is still wet, lift prepared canvas off easel (with helper, if it is large) and align it FACE DOWN over your wet paper, taking care not to let it touch the paper. When you are happy with the alignment, let the canvas touch down onto the paper. Only do this ONCE. DO NOT be tempted to move or adjust the placement of the canvas once it has made contact with the paper. It helps to practice this maneuver with a dry run before you have wet your paper and applied gel to canvas.
8. Press down on back of canvas to help it stick a bit to the paper.
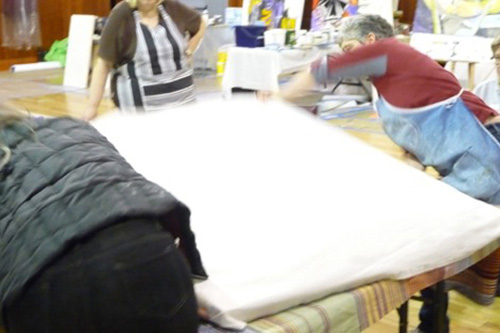
9. Using the drop cloth to help hold the painting onto the canvas, carefully flip the whole thing over. At this point I move it to a large table to make the rest of the steps easier, but you can leave it on the floor if you have to.
9. Using the drop cloth to help hold the painting onto the canvas, carefully flip the whole thing over. At this point I move it to a large table to make the rest of the steps easier, but you can leave it on the floor if you have to.

10. Remove the drop cloth. Your painting will now be face up.
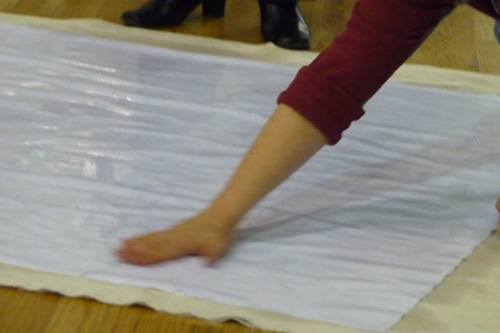
11. Pour or spray some water on the surface of your painting, and GENTLY, using just your hand, and working from the centre out the edges, smooth the air pockets out from under your painting. Keeping the surface of the painting wet and adding a little glazing medium will help to lubricate it and prevent dragging and creasing. Do NOT use a brayer or a squeegee.
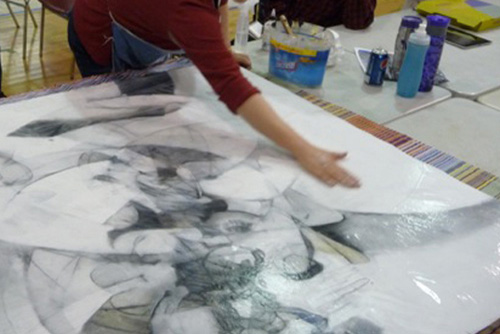
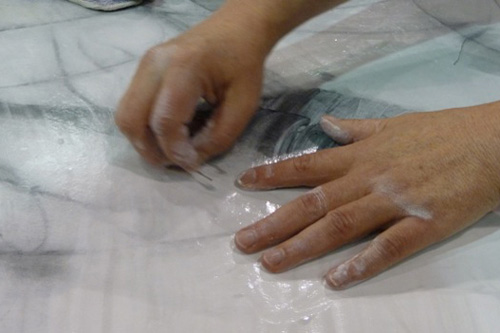
12. Continue smoothing until all the large and medium air pockets are removed. Smaller air pockets that refuse to move to edge may be carefully pierced with sharp needle or pin and the air smoothed out that way. Ensure that you slide the needle in on an angle to avoid getting it stuck in the canvas below the paper. Very tiny bubbles tend to disappear on their own during the drying process.
13. Give surface of painting a final wipe with damp cloth.
14. Ensure that excess paper around edges is NOT bent over and stuck to the sides of your canvas. It will be very difficult to remove later if it is.
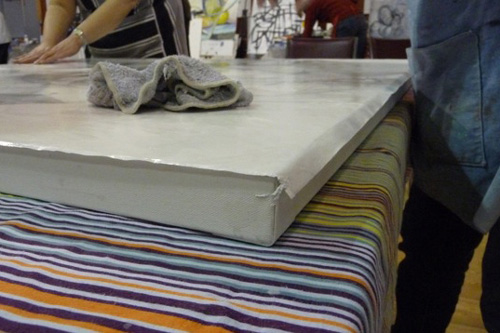
15. Leave in place, flat and face up, to dry for 24 hours. Lifting the canvas up on jars of paint (or whatever you have) place carefully under the stretcher part of the canvas to allow air to circulate underneath is a good idea.
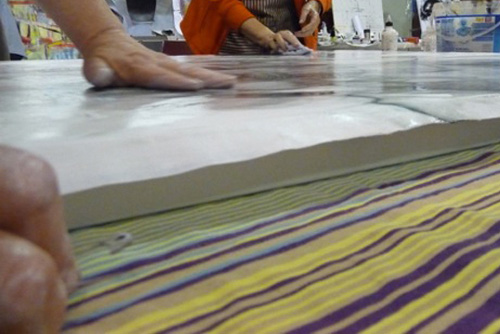
16. When the painting is fully dry, take a sharp blade and VERY CAREFULLY slice off the excess paper around edges, as close to the canvas as possible without actually cutting into the canvas.
14. Ensure that excess paper around edges is NOT bent over and stuck to the sides of your canvas. It will be very difficult to remove later if it is.
15. Leave in place, flat and face up, to dry for 24 hours. Lifting the canvas up on jars of paint (or whatever you have) place carefully under the stretcher part of the canvas to allow air to circulate underneath is a good idea.
16. When the painting is fully dry, take a sharp blade and VERY CAREFULLY slice off the excess paper around edges, as close to the canvas as possible without actually cutting into the canvas.

17. At this point, you may find a few small sections that are not adhered all the way to the edge. Using a toothpick or small brush, use gel medium to glue these areas down. Let dry.
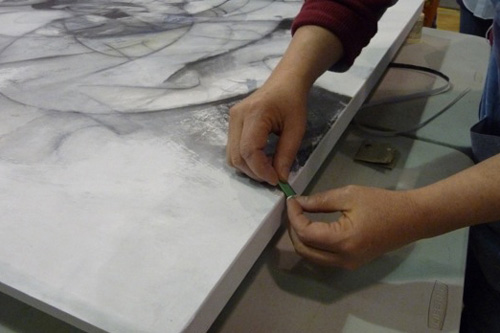
18. Take rough sandpaper and buff edges. Take care to buff down towards canvas in order to avoid accidentally lifting paper off canvas. Buff again with finer grit sandpaper for a perfectly smooth join.
18. Take rough sandpaper and buff edges. Take care to buff down towards canvas in order to avoid accidentally lifting paper off canvas. Buff again with finer grit sandpaper for a perfectly smooth join.
Important things to note:
My process uses lots of water, on both the front and back of the painting, so this method will not work for pieces that have unsealed areas, such as charcoal, pastel, etc, or if your painting is not well dried yet. I would recommend waiting at least a few days after finishing painting before mounting using this method.
If you plan to use water sensitive media in your work, it is best to mount the paper onto the canvas early on, before these are added. You can, in fact, mount the paper to to canvas BEFORE you even start your painting. If you do this, you must first seal the working side of your paper with at least two coats of gesso, followed by at least two coats of matte medium.
**VERY IMPORTANT** DO NOT seal the back of your painting. Leave as raw paper.
I mount 48" x 48" paper onto a 48" x 48" canvas. Because the paper expands slightly during the process I don't need to start with paper that is larger than the canvas. There will be enough expansion so that I have about 1/4" to 1/2" overhang on all sides.
I use Opus Exhibition Canvas with 1.5" deep stretcher bars. It is important, especially for larger pieces to use the deep profile canvas with well made stretchers, as there is considerable tension once the mounted paper dries, and a canvas on thinner stretchers may warp.